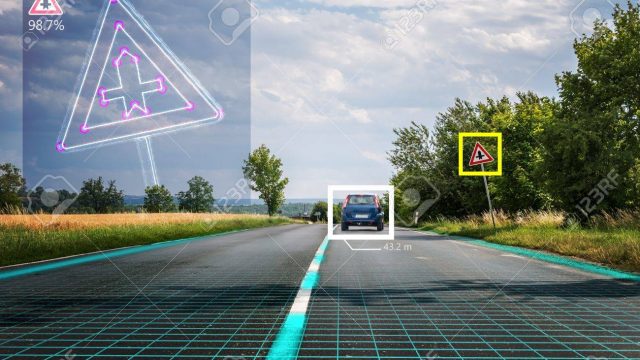
MediaPipeはGoogle社製のライブメディアとストリーミングメディア向けのMLソリューションです。
種類が豊富で、姿勢推定や手・顔の動きなどあります。
google meetで実装されているバーチャル背景なんかもこの技術が利用されています。
これを使うことでTikTokのフィルターのようなものも作成することができます。
詳しくは公式サイトを参照
https://google.github.io/mediapipe/
今回実装するFaceMeshはJSとPythonと提供されていますが、Attention Meshという技術を利用してモバイル・デバイス上でも高速かつ高精度な人の顔の位置と表情の推論を可能にしています。
論文に記載されているようなどうやって実現しているかについては触れず、ローカルでの実装の仕方について解説します。
Pythonでの実装方法
必要なライブラリはopenCVとmediapipeです。
どちらもPyPiで提供されているので簡単にインストールすることができます。
pip install mediapipe opencv-python続いて、コードを書いていきます。
import cv2
import mediapipe as mp
import time

cap = cv2.VideoCapture(0)
pTime = 0

mpDraw = mp.solutions.drawing_utils
mpFaceMesh = mp.solutions.face_mesh
faceMesh = mpFaceMesh.FaceMesh(max_num_faces=1)
drawSpec = mpDraw.DrawingSpec(thickness=1, circle_radius=2)

while True:
  success, img = cap.read()
  imgRGB = cv2.cvtColor(img, cv2.COLOR_BGR2RGB)
  results = faceMesh.process((imgRGB))
  if results.multi_face_landmarks:
      for faceLms in results.multi_face_landmarks:
          mpDraw.draw_landmarks(img, faceLms, mpFaceMesh.FACE_CONNECTIONS, drawSpec, drawSpec)

          for id, lm in enumerate(faceLms.landmark):
              print(lm)
              ih, iw, ic = img.shape
              x, y  = int(lm.x*iw), int(lm.y*ih)

  cTime = time.time()
  fps = 1/(cTime - pTime)
  pTime = cTime
  cv2.putText(img, f'FPS: {int(fps)}', (20, 70), cv2.FONT_HERSHEY_PLAIN,
              3, (0, 255, 0), 3)
  cv2.imshow('image', img)
  cv2.waitKey(1)
量としては、この程度で実装可能です。
FPSを計算するためにtimeモジュールを使用して計算したりしていますが、不必要であれば削ってコード短縮できたりもします。
JS側での実装方法
今回はReact+npmパッケージで作成しています。
CDNや生JSでの実装方法でも大した差はないので適宜変更してもらえればと思います。
create-react-appでReact環境作成したら、npmで必要なパッケージをインストールします。
今回インストールするのは、Webカメラを使用するためのモジュールと機械学習を動かすためのtensorflow.js、最後に今回使用するfacemeshモジュールです。
npm install react-webcam @tensorflow/tfjs @tensorflow-models/face-landmarks-detection注意点としては、githubのREADMEに載っている@tensorflow-models/facemeshではなく上記の通りにパッケージをインストールしてください。
というのも、@tensorflow-models/facemeshはアップデートされなくなってしまったので、古いバージョンで止まってしまっているためです。
後は、App.jsを変更していくだけです。
import React, { useRef, useEffect } from "react";
import * as tf from "@tensorflow/tfjs";
import Webcam from "react-webcam";
import * as facemesh from "@tensorflow-models/face-landmarks-detection";
import "./App.css";

function App() {
  const webcamRef = useRef(null);
  const canvasRef = useRef(null);

  // load facemesh
  const runFacemesh = async () => {
    const net = await facemesh.load(
      facemesh.SupportedPackages.mediapipeFacemesh
    );
    setInterval(() => {
      detect(net);
    }, 100);
  };

  const detect = async (net) => {
    if (
      typeof webcamRef.current !== "undefined" &&
      webcamRef.current !== null &&
      webcamRef.current.video.readyState === 4
    ) {
      const video = webcamRef.current.video;
      const videoWidth = webcamRef.current.video.videoWidth;
      const videoHeight = webcamRef.current.video.videoHeight;

      // Set video width
      webcamRef.current.video.width = videoWidth;
      webcamRef.current.video.height = videoHeight;

      // Set canvas width
      canvasRef.current.width = videoWidth;
      canvasRef.current.height = videoHeight;

      const face = await net.estimateFaces({ input: video });
    }
  };

  useEffect(() => {
    runFacemesh();
  }, []);

  return (
    <div className="App">
      <header className="App-header">
        <Webcam
          ref={webcamRef}
          style={{
            position: "absolute",
            marginLeft: "auto",
            marginRight: "auto",
            left: 0,
            right: 0,
            textAlign: "center",
            zindex: 9,
            width: 640,
            height: 480,
          }}
        />

        <canvas
          ref={canvasRef}
          style={{
            position: "absolute",
            marginLeft: "auto",
            marginRight: "auto",
            left: 0,
            right: 0,
            textAlign: "center",
            zindex: 9,
            width: 640,
            height: 480,
          }}
        />
      </header>
    </div>
  );
}

export default App;
後は、npm startでサーバーを起動してあげれば実装完了です。
実際に動かすとこんな感じになります。見てわかる通り側面は取れないので実際に使う場合には注意が必要です。


